Creating a custom LinkedIn OAuth application
The step-by-step instructions below follow LinkedIn's documentation on setting up OAuth 2.0 for a web application.
Create credentials for ngrok
-
Navigate to the LinkedIn Developer Portal, sign in, click My apps on the top menu, and then click Create app.
-
Enter App name, select a LinkedIn Page, enter the Privacy policy URL in the corresponding fields, and then click Create app.
-
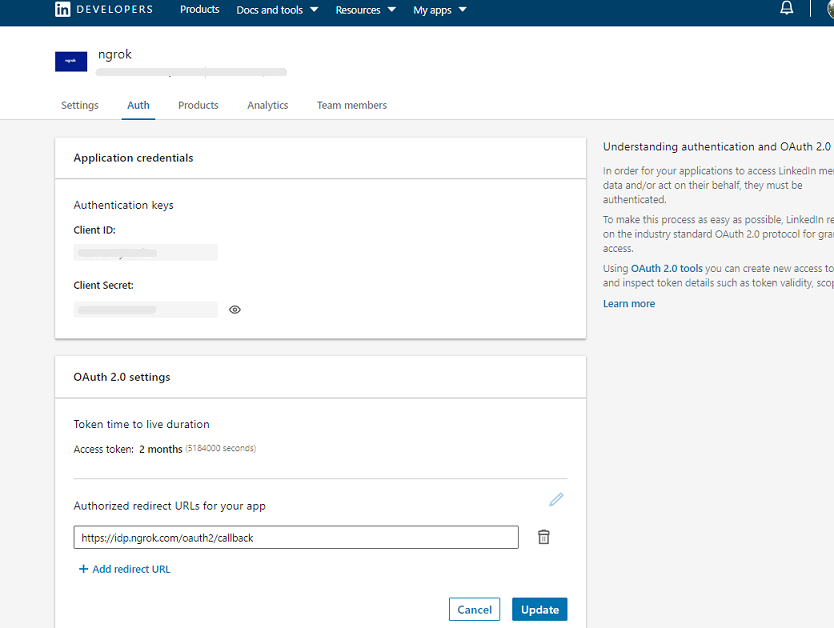
On the app page, click the Auth tab and make note of both the Client ID and Client Secret values.
-
Click the pencil icon for the Authorized redirect URLs in the OAuth 2.0 settings section, add the ngrok oauth callback URL (i.e.
https://idp.ngrok.com/oauth2/callback), and then click Update.
-
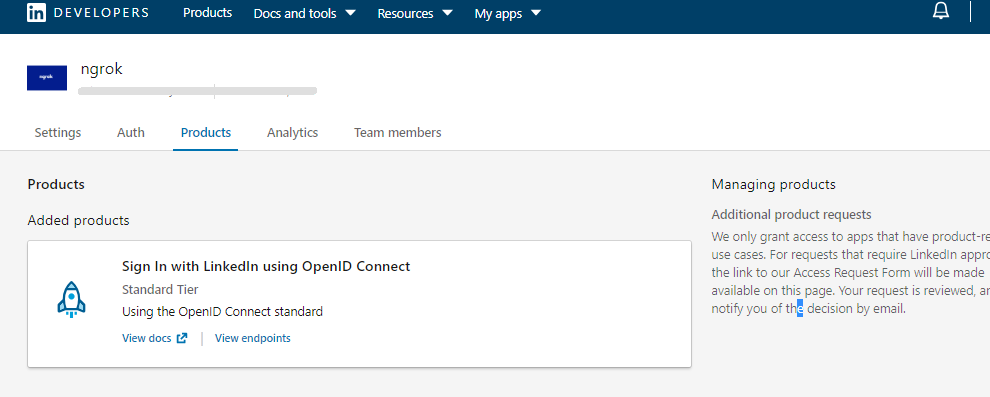
Click the Products tab, and then click Request access for Sign In with LinkedIn using OpenID Connect.

Update your endpoint configuration
-
Access the ngrok Dashboard, sign in, create or edit an edge, and click OAuth to enable the OAuth configuration.
-
Select LinkedIn in the Identity Provider selector, and select Use my own OAuth application in the OAuth Application field.
Note: Alternatively, you can select Use an ngrok-managed OAuth application. If so, there is no need to create an application in the LinkedIn developer portal.
-
Enter the Client ID and Client Secret values you copied previously in the corresponding fields and then click Save to save the edge configuration.
-
Access your application using the link provided by the Endpoints URL of your edge.